
Heat transfer vinyl (HTV) is a popular choice for customizing apparel, but what happens when it’s time to remove it? Whether it’s for a new design, a mistake, or simply updating your wardrobe, knowing how to effectively remove HTV is crucial for crafters and DIY enthusiasts. Many may feel frustrated or apprehensive about the process, fearing damage to the fabric or lingering adhesive. Fortunately, there are proven methods to safely and efficiently remove HTV without compromising the integrity of your garments. In this article, we’ll explore various techniques that can restore your fabric to its original state, giving you the freedom to create and innovate without worry. Curious about the best practices? Let’s dive in and uncover the effective solutions for your heat transfer vinyl removal challenges.
Understanding Heat Transfer Vinyl Materials and Their Adherence
Understanding the materials behind heat transfer vinyl (HTV) is crucial for anyone looking to effectively work with these versatile crafting tools. HTV is a durable material made from a variety of polymers, specifically designed to adhere to fabric through the application of heat and pressure. The most common types of HTV are polyurethane (PU) and polyvinyl chloride (PVC), each with unique properties affecting their adherence and durability. PU is often favored for its softness and stretchability, making it suitable for garments that require flexibility. Conversely, PVC may provide a thicker and more rigid finish, offering different visual and tactile results.
When heat transfer vinyl adheres to fabric, it relies on a combination of heat, pressure, and time. These elements activate the adhesive layer on the vinyl, causing it to bond chemically with the fabric fibers. The recommended temperature typically ranges from 305°F to 330°F (150°C to 165°C), and the application of pressure can be achieved using a heat press or an iron. Understanding this process is essential not just for application, but also for removal, as improper heating or pressure could lead to incomplete adhesion or damage to the fabric.
Factors Affecting Adhesion
Several factors can influence how well HTV adheres to different fabrics. These include:
- Fabric Type: Natural fibers like cotton generally provide better adhesion than synthetic blends.
- Fabric Preparation: Cleaning the fabric surface before application can improve the bond.
- Thickness of HTV: Thicker materials may require different heat settings or application techniques.
Moreover, the age and condition of the HTV can affect its adherence capability; older, improperly stored vinyl may not perform as effectively as fresh materials. Understanding these nuances can empower crafters to make informed choices, whether they are applying new designs or attempting to remove old vinyl. In summary, grasping the science of HTV materials and their bonding mechanics is indispensable for achieving the desired results in your crafting projects.
Why You Might Need to Remove Heat Transfer Vinyl
Removing heat transfer vinyl (HTV) can be as necessary as the initial application itself. Whether the design is outdated, the garment has sustained damage, or you simply wish to repurpose the fabric, understanding when and why to remove HTV is crucial for any crafter. Often, HTV is applied with strong adhesives, and over time, even the best heat application may not withstand repeated washes, causing the vinyl to peel or warp. This deterioration can detract from the appearance of your fabric, prompting the need for removal.
Beyond aesthetics, there are practical reasons for vinyl removal. Perhaps the original application didn’t quite hit the mark in terms of placement or sizing, and adjusting for a perfect fit requires lifting the existing design. Additionally, if you’re reusing fabric for new projects, removing HTV can provide a clean slate. It’s important to note that improper removal techniques can damage the underlying fabric, making it essential to use effective and safe methods that respect the integrity of the material.
When considering removal, it’s also vital to factor in the quality and age of the HTV. Older or poorly stored vinyl can become brittle, making it more challenging to remove cleanly. This situation emphasizes the need for precision and care during the removal process to avoid leaving residues or damaging the fabric itself. Understanding these circumstances can help crafters make informed decisions and preserve their beloved fabrics for future creative endeavors.
In conclusion, recognizing the necessity of HTV removal can lead to more successful crafting outcomes. Knowing when to take action and employing the right techniques ensures your projects not only meet your vision but also stand the test of time.
Essential Tools for Effective Vinyl Removal
Removing heat transfer vinyl (HTV) effectively can make the difference between a straightforward task and a frustrating project. Having the right tools at your disposal not only streamlines the process but also ensures that you minimize damage to your fabric. Below are essential tools that can enhance your vinyl removal experience.
Essential Tools for Vinyl Removal
To start, heat source tools are crucial. A heat gun or a household iron can effectively loosen the adhesive bond holding the HTV to your fabric. When using an iron, ensure to set it on a low to medium setting, usually cotton or polyester, and avoid using steam to prevent any fabric mishaps. Applying gentle heat through a pressing cloth helps protect the fabric from direct contact while softening the vinyl.
Next, having plastic scrapers or spatulas can be a game changer. These tools allow you to carefully lift the edges of the vinyl without puncturing or cutting into the fabric itself. Look for scraper tools made of plastic rather than metal to avoid scratches on the material. Additionally, a pair of tweezers can help grasp small pieces of vinyl, making it easier to peel and ultimately minimize residue.
Another vital component is a deglosser or adhesive remover. These chemical solutions can help break down the glue, especially if traditional heat methods falter. When working with chemicals, always ensure to work in a well-ventilated area and perform a patch test on a hidden section of the fabric to avoid discoloration or damage.
Finally, protective gear like gloves can safeguard your hands from any heat or chemicals involved in the process. While it may seem like a minor detail, taking these precautions not only keeps you safe but also allows for a smoother, less stressful experience.
In summary, using the right tools-like heat sources, scrapers, adhesive removers, and protective gear-will set you up for success in your HTV removal project. Each tool plays a specific role, helping you achieve your goal of fabric preservation while providing a polished finish to your creative endeavors.
Step-by-Step Guide: Removing HTV with Heat
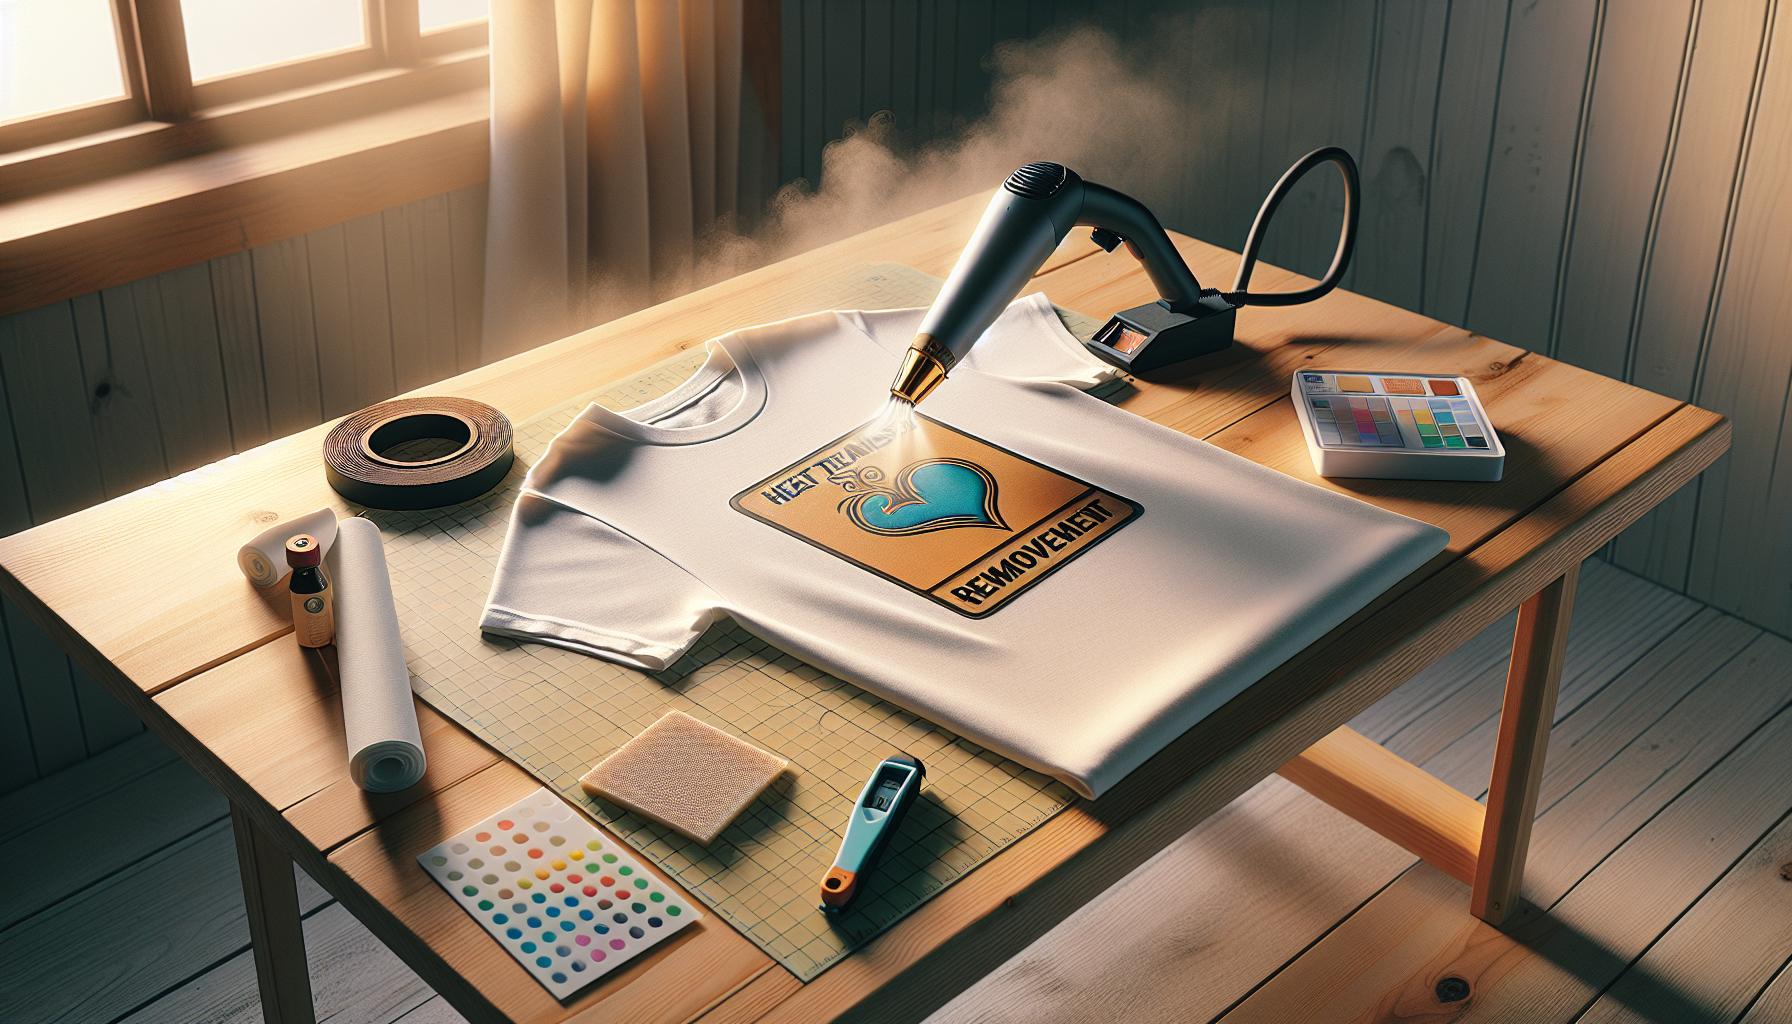
To effectively remove heat transfer vinyl (HTV) from fabric, you’ll want to follow a clear and strategic process that ensures both the vinyl and your fabric remain in good condition. The goal here is to soften the adhesive backing of the HTV so that it can be peeled away smoothly without causing damage.
Start by preparing the area where you’ll be working. Lay the fabric flat on a heat-resistant surface and ensure that you have your heat source ready. If using an iron, set it to a low or medium setting-not higher than cotton-and avoid steam. If you’re using a heat gun, keep it at a moderate heat level. It’s wise to have a pressing cloth on hand; this will protect your fabric from direct heat, which can cause burns or discoloration.
Step-by-Step Process
- Apply Heat: Place the pressing cloth over the area with the HTV. If you’re using the iron, press it down gently for about 10-15 seconds. With a heat gun, hold it approximately 6 inches away from the vinyl and move it back and forth to evenly distribute the heat. You’re looking to soften the vinyl, not scorch the fabric.
- Check the Adhesion: After heating, lift one corner of the HTV with a plastic scraper or your fingers (careful of the heat). If it begins to peel away easily, you’re on the right track. If it still feels firmly attached, apply more heat and check again.
- Peel the Vinyl: Once the vinyl has softened, slowly peel it back at a 45-degree angle. If you encounter resistance, reapply heat to that area while gently lifting the vinyl. This helps prevent tearing, which can make removal more difficult.
- Clean Up Residue: After removing the vinyl, it’s common to have some sticky residue left on the fabric. Use an adhesive remover suitable for your fabric type, or apply a small amount of rubbing alcohol or oil on a cloth and dab it onto the residue. Gently scrub the area until the adhesive is gone, and then launder the fabric as per care instructions to remove any remaining chemicals.
Important Tips
- Testing: Always do a spot test on an inconspicuous area of the fabric to ensure that the heat doesn’t damage it.
- Be Patient: Rushing the process can lead to fabric damage, so take your time.
- Safety First: Use gloves when handling heated tools and chemicals, protecting your hands from burns or irritation.
By adhering to this methodical approach, you’ll find that removing HTV can be a manageable task that keeps your fabrics looking great, allowing for successful repurposing or refreshing of your materials.
Alternative Methods: Using Chemicals for Vinyl Removal
Using chemicals to remove heat transfer vinyl (HTV) can be a practical alternative for those looking to save time or when traditional methods fall short. These methods can be particularly effective for stubborn or older HTV that has become firmly adhered to the fabric, as chemical agents penetrate through the vinyl layers, breaking down the adhesive bond without requiring increased physical effort or excessive heat. However, it’s essential to approach this method with caution to avoid fabric damage.
Before proceeding with chemical methods, gather the right materials. Commonly used agents include rubbing alcohol, nail polish remover (acetone), and specialized adhesive removers available at craft or hardware stores. Each of these options offers different strengths; for instance, rubbing alcohol is less aggressive and can be used on delicate fabrics, while acetone may effectively dissolve vinyl but should be tested first on an inconspicuous area due to its potency.
Step-by-Step Process for Chemical Removal
- Test the Fabric: Always conduct a patch test on a hidden part of the garment. Apply a small amount of your chosen chemical and check for any adverse effects such as discoloration or damage.
- Apply the Chemical: Soak a cotton ball or cloth with your chosen solvent and gently dab it onto the HTV, ensuring that it’s saturated but not overly wet. Avoid soaking the fabric itself to prevent unintended damage.
- Let It Sit: Allow the chemical to sit for several minutes. This step is crucial as it gives the solvent time to penetrate and weaken the adhesive bond.
- Peel the Vinyl: Using a plastic scraper or your fingers, try to lift the vinyl gently. If the vinyl doesn’t lift easily, apply more solvent and wait a little longer before attempting again.
- Clean Up: Once the vinyl is removed, clean the fabric with soap and water to remove any residual chemicals. Follow up by washing according to care instructions to ensure all chemical traces are eliminated.
While chemical removal can be a reliable alternative, it’s essential to balance effectiveness with fabric care. Keep in mind that certain fabrics, such as those with intricate weaves or finishes, might be more susceptible to damage. Therefore, understanding the type of fabric you are working with and choosing the right chemical for removal is key to preserving the integrity of your textiles while effectively tackling unwanted HTV.
How to Remove Heat Transfer Vinyl from Different Fabrics
To successfully remove heat transfer vinyl (HTV) from various fabric types, it’s essential to understand that each fabric presents unique challenges and behaviors when exposed to removal techniques. From cotton to polyester blends and sensitive fabrics like silk, knowing how to approach HTV removal ensures you don’t compromise the integrity of the garment.
For cotton fabrics, which are generally robust, both heat and chemical methods can be effective. To start, you can use a heat source, such as a hairdryer, to soften the vinyl. Once it’s pliable, carefully peel it off with a plastic scraper. If this doesn’t work, switch to chemical removers like rubbing alcohol, applying it cautiously as described in previous sections.
In contrast, polyester and synthetic blends can be trickier due to their lower melting points. Here, heat should be used sparingly to avoid damaging the fabric. Instead of direct heat, a good approach is to place a cloth over the HTV and apply warm iron settings, monitoring closely as the fabric heats up. Once softened, use a plastic scraper to remove the vinyl gently. If residues remain, a targeted application of a solvent on a cotton ball can help lift any stubborn pieces without risking fabric integrity.
For delicate fabrics like silk or lace, extreme care is necessary. It’s best to avoid heat entirely; instead, focus on applying solvents like acetone. Always perform a patch test on a hidden seam first to ensure the solvent doesn’t cause any discoloration. If successful, use a soft cloth to dab the solvent on the HTV, allowing it to penetrate for several minutes before gently scraping off the vinyl. Always follow up with a gentle wash to remove any chemical traces, ensuring the fabric remains pristine.
In summary, effective HTV removal hinges on understanding the specific fabric you are dealing with, adapting your methods accordingly, and exercising patience throughout the process. Remember that testing and careful application can save you from mishaps and preserve your favorite garments for future wear.
Mistakes to Avoid When Removing HTV
When it comes to removing heat transfer vinyl (HTV), avoiding common pitfalls can mean the difference between a successful removal and a damaged garment. Many people rush into the process without fully understanding the properties of the material they’re working with, leading to mistakes that can be costly. Here are several key missteps to avoid:
One of the most prevalent errors is using too much heat, especially on sensitive fabrics. Heat transfer vinyl is designed to adhere tightly when exposed to high temperatures, but aggressive application can lead to burning or scorching the fabric underneath. To avoid this, always check the heat tolerance of your specific fabric type. For instance, while cotton can handle heat better, delicate fabrics like silk require a more cautious approach, often utilizing lower heat settings or indirect heat methods.
Another frequent misjudgment is neglecting to test a small, hidden area before proceeding. Each material responds differently, and what works on one fabric may not be suitable for another. Performing a patch test with your chosen removal technique, whether it’s heat or a solvent, can help determine the safest approach without risking damage to the visible sections of the fabric. This small step can save you from unwarranted disappointment.
Additionally, many overlook the importance of patience and methodology. Rushing through the process can lead to tearing the fabric or leaving behind stubborn vinyl that is harder to remove once it cools or adheres more tightly after a failed attempt. Always allow sufficient time for the heat or solvent to penetrate the HTV properly. Gently scraping off the vinyl requires care and slow movements-hastily yanking on the material can result in mishaps or fabric snags.
In summary, steering clear of excessive heat, skipping the patch test, and rushing the removal process are crucial to successfully handling HTV. Adopting a methodical and informed approach will not only preserve your fabric integrity but will also lead to more satisfying results overall.
Tips for Preserving Fabric Integrity During Removal
When dealing with heat transfer vinyl (HTV), the integrity of the fabric is paramount, especially during the removal process. Not only can improper removal methods damage your garment, but they can also affect the fabric’s texture and longevity. Understanding how to appropriately approach HTV removal will save you time, frustration, and ultimately ensure your fabric remains intact for future use.
One of the most effective strategies for preserving fabric integrity is to utilize appropriate heat settings tailored to the specific fabric type. Natural fibers like cotton and linen can withstand higher temperatures, but synthetic fibers such as polyester or blends are at greater risk of melting or deforming under heat. Using a heat source with adjustable settings allows you to start on a lower temperature and gradually increase it only if necessary. This cautious approach minimizes the chances of thermal damage. Additionally, consider using a pressing cloth, which acts as a barrier to distribute heat evenly and protect delicate fabrics.
Another essential practice is to engage in gentle techniques during the removal process. Instead of applying forceful scrapes or pulls, adopt a slow and methodical approach. Start by using a corner of the vinyl, gently lifting it with a tweezers or a specialized vinyl removal tool. If resistance is encountered, reapply heat, as this can reactivate the adhesive, making removal easier without tearing the fabric. Take your time-quick, jerky motions can lead to fabric tears or distortions.
Finally, always test on an inconspicuous area before full application. Each fabric behaves uniquely with HTV, and a small patch test will guide your choice of method and heat application. If you know how your specific material reacts to heat or solvents, you can adjust your technique accordingly, preserving fabric integrity throughout the process. Whether you’re revising a design or simply removing outdated interest, remember that careful practices can extend the life and beauty of your garments.
Preventing Future Vinyl Adhesion Issues

To avoid the frustration of dealing with stubborn heat transfer vinyl (HTV) in the future, it’s essential to implement preventive measures during the initial application. Proper installation not only enhances the appearance of your design but also ensures that the vinyl adheres optimally to the fabric, reducing the likelihood of peeling or needing removal later on. One major consideration is the choice of HTV compatible with your fabric type. Different materials respond uniquely to heat and adhesive properties, making it crucial to choose HTV that matches your intended surface.
Additionally, controlling the application temperature can have a significant impact on how well the HTV sticks. Using the right heat press settings is key; for instance, natural fibers typically require higher temperatures compared to synthetics. Pay attention to the recommended heat and pressure specifications provided by the HTV manufacturer. Utilizing a temperature-controlled heat press can help maintain consistent and appropriate heat application, which is pivotal in achieving a strong bond without risking fabric damage.
When applying HTV, layering can often introduce complexity into the adhesion process. If you’re using multiple layers, ensure that the underlying vinyl is completely adhered before adding another layer on top. One effective approach is to pre-press the base fabric for a few seconds before applying the HTV, ensuring that it’s wrinkle-free and ready to receive the vinyl. Moreover, after the application, avoid exposing the garment to harsh conditions (like heavy washing or drying on high heat) for the first 24 hours, allowing the adhesive to set firmly.
Employing these strategies not only minimizes future adhesive issues but also takes your crafting and design work to the next level. Take time to educate yourself on the materials and procedures involved. Over time, you’ll refine your techniques, leading to a more successful and enjoyable experience with heat transfer vinyl, resulting in projects that last and look great.
FAQs: Common Concerns About Vinyl Removal Techniques
Have you ever found yourself in a situation where you need to remove heat transfer vinyl (HTV) but are unsure about the best approach? You’re not alone! Many crafters encounter dilemmas when trying to eliminate HTV seamlessly without damaging the underlying fabric. Here’s what you need to know about effective vinyl removal techniques and how to tackle common issues.
First and foremost, consider the fabric type because it significantly influences the removal process. Different fabrics react differently to heat and adhesive, which could affect the integrity of the material during removal. Always test your method on a small, inconspicuous area first. For heat-sensitive fabrics, using a lower heat setting or opting for solvents may be advisable instead of direct heat.
When it comes to tools, having the right equipment can make all the difference. Essential items include a heat gun or a simple household iron, a pair of tweezers, and possibly a scraping tool for stubborn areas. Heat helps to soften the adhesive, making it easier to lift the vinyl. A common mistake is applying too much pressure during scraping, which can damage the fabric. Instead, gently lift the edges of the vinyl to avoid tearing the material beneath.
In terms of methods, using heat is often the most effective approach. Carefully apply heat to the HTV, and once it’s warm, use your tweezers to peel it off. Some crafters find that pairing this method with a commercial adhesive remover can expedite the process, especially for layers with strong adhesive bonds. Always ensure you follow up with a cleaning step to remove any residual adhesive on the fabric.
Lastly, it’s crucial to recognize that patience is key. Rushing through the removal can lead to mistakes, like tearing the fabric or leaving behind adhesive residue. By allocating enough time and employing the right strategies, you’ll not only succeed in removing HTV but also preserve the integrity of your fabric for future projects.
Frequently asked questions
Q: What are the best methods for removing heat transfer vinyl (HTV) from fabric?
A: The most effective methods for removing HTV include using heat to soften the adhesive, chemical removers that break down the vinyl, and careful peeling. For optimal results, refer to our *Step-by-Step Guide: Removing HTV with Heat* and *Alternative Methods: Using Chemicals for Vinyl Removal* sections.
Q: Can heat transfer vinyl be removed without damaging the fabric?
A: Yes, heat transfer vinyl can be removed without damaging most fabrics if done carefully. Using a heat source to loosen the adhesive and gently peeling off the vinyl usually preserves the fabric’s integrity. Check our *Tips for Preserving Fabric Integrity During Removal* for detailed advice.
Q: How long does it take to remove heat transfer vinyl?
A: The time it takes to remove heat transfer vinyl varies based on the method used and the complexity of the design. Generally, using heat can take about 10-15 minutes, while chemical methods may require additional time for soaking. For a more efficient process, refer to our *Essential Tools for Effective Vinyl Removal* section.
Q: Will removing heat transfer vinyl leave residue on fabric?
A: Removing heat transfer vinyl may leave some adhesive residue on the fabric. However, this can often be removed using an adhesive remover or rubbing alcohol. For effective cleaning techniques, see our *FAQs: Common Concerns About Vinyl Removal Techniques*.
Q: Why does heat transfer vinyl sometimes not adhere well?
A: Poor adhesion can result from insufficient heat during application, low-quality vinyl, or fabric that isn’t suited for HTV. For tips on preventing future adhesion issues, explore our *Preventing Future Vinyl Adhesion Issues* section.
Q: Is it possible to remove heat transfer vinyl from multilayer designs?
A: Yes, but it requires caution. Start with the top layer using heat and peel it back, then repeat for each subsequent layer. This keeps the fabric intact and reduces the risk of damage. Refer to our guide on *How to Remove Heat Transfer Vinyl from Different Fabrics* for specific instructions.
Q: Can I use a household iron to remove heat transfer vinyl?
A: Yes, a household iron can be used to apply heat to HTV for removal. Use a medium setting and place a thin cloth between the iron and the vinyl to prevent damage. For more tips, check our *Step-by-Step Guide: Removing HTV with Heat*.
Future Outlook
Removing heat transfer vinyl (HTV) is not only possible but can be straightforward when you employ the right methods we discussed. Whether you’re looking to refresh a design or fix a mistake, understanding the various techniques will empower you to achieve the results you desire without damaging your fabric. If you still have questions or need personalized advice, consider checking out our detailed guides on fabric care and heat transfer method comparisons.
Ready to take the next step? Dive into our comprehensive resource on vinyl applications and best practices to enhance your crafting skills. Don’t forget to subscribe to our newsletter for exclusive tips and updates straight to your inbox. Join the conversation by sharing your experiences or asking questions in the comments below! Your journey with HTV can be just beginning-let’s keep exploring together!
Get our latest guides, news, and insights highlighted in your Google Search & AI Overviews.